Monitoring Solar Watts, Amps over the internet using a Current Shunt Resistor
Monitoring solar panel performance is an important part of any installation as it allows you to know right away if there’s a problem with your system.
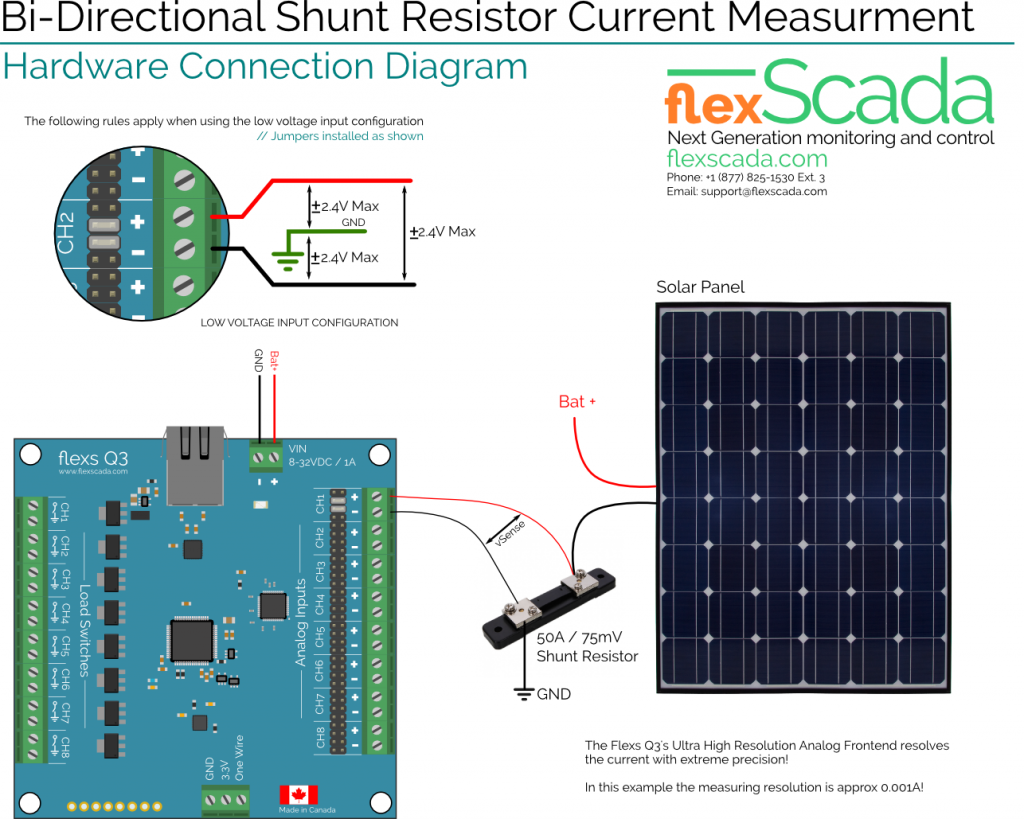
In this example we use a shunt resistor to measure current from a solar panel (Solar Charge Controller not shown), since the Flexs Q3 can measure both negative and positive voltage, shunts can be used to measure current bi-directionally.. e.g. +5A (Charging) or -2A (Discharging)
The most important thing when measuring current using shunts is to ensure that the shunt is ALWAYS USED ON THE LOW SIDE, e.g. ALWAYS WITH ONE SIDE CONNECTED TO GROUND otherwise the Flexs Q3 could be potentially damaged!
Combining this with the Battery Voltage Monitoring example and a single line of logic to multiply the solar amps by the battery voltage will give us Watts, ready to log over the internet via SNMP or using our free dashboard creation tool!
This example shows that measuring solar panel output with a Shunt Resistor that works by creating a voltage drop proportional to the current across it.
Other options for measuring DC current offer isolation from the detected current allowing them to be used on the high voltage side.. These include Non Invasive Flux Sensors and Hall Sensor Modules like the ACS-712 or ACS715
Configuring an Input Channel for Shunt Operation
Step 1: Install the jumpers as shown in the diagram above
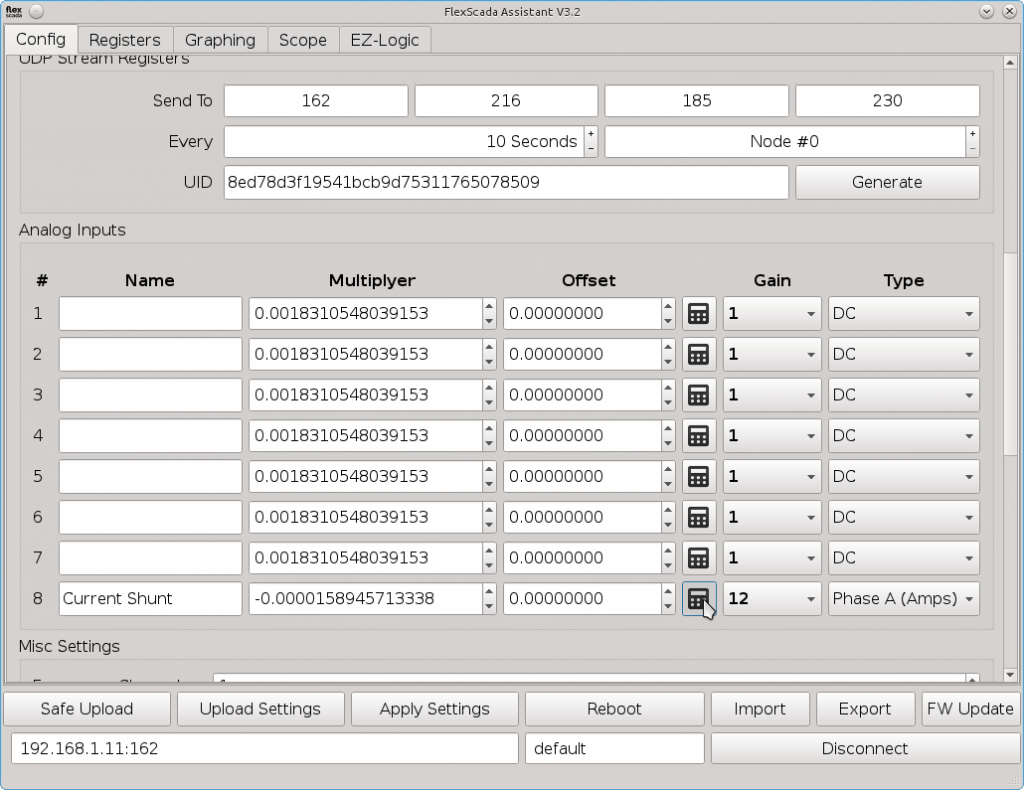
Step 2: After connecting to the device with the configuration assistant click the “calculate” button on channel that you just configured with the jumpers (Example Screenshot below)
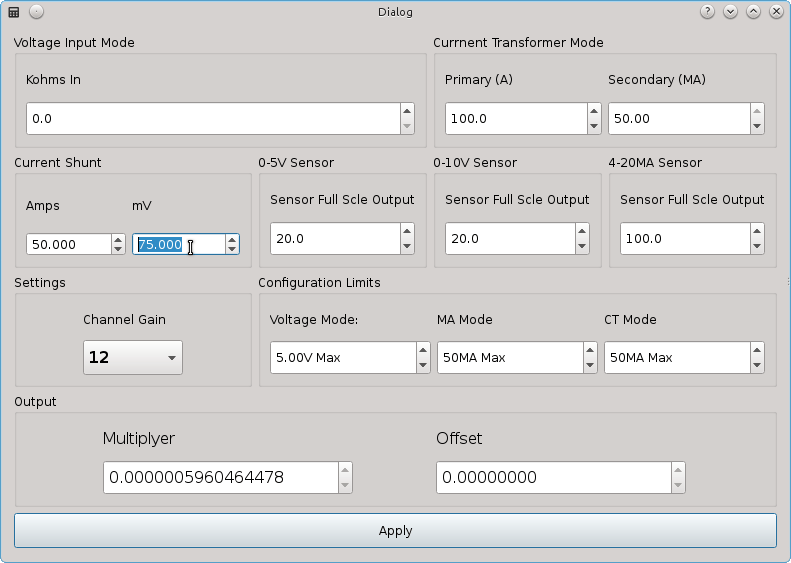
Step 3: Enter your current shunt’s ratio and click apply
Step 4: Your settings are now ready to upload and apply!


