Using the Flexs Q3 with the FlexScada online management interface
// This guide is currently under construction and is not considered final, please keep this in mind as your read it
Step 1. Follow the steps outlined in the Quick Start Guide (Html) (Pdf), after completion you should have the configuration assistant open and connected to the board
Step 2. Update the firmware on the device by downloading the latest firmware from here and clicking the “FW Update” button in the bottom right of the Configuration Assistant and selecting the file you downloaded…
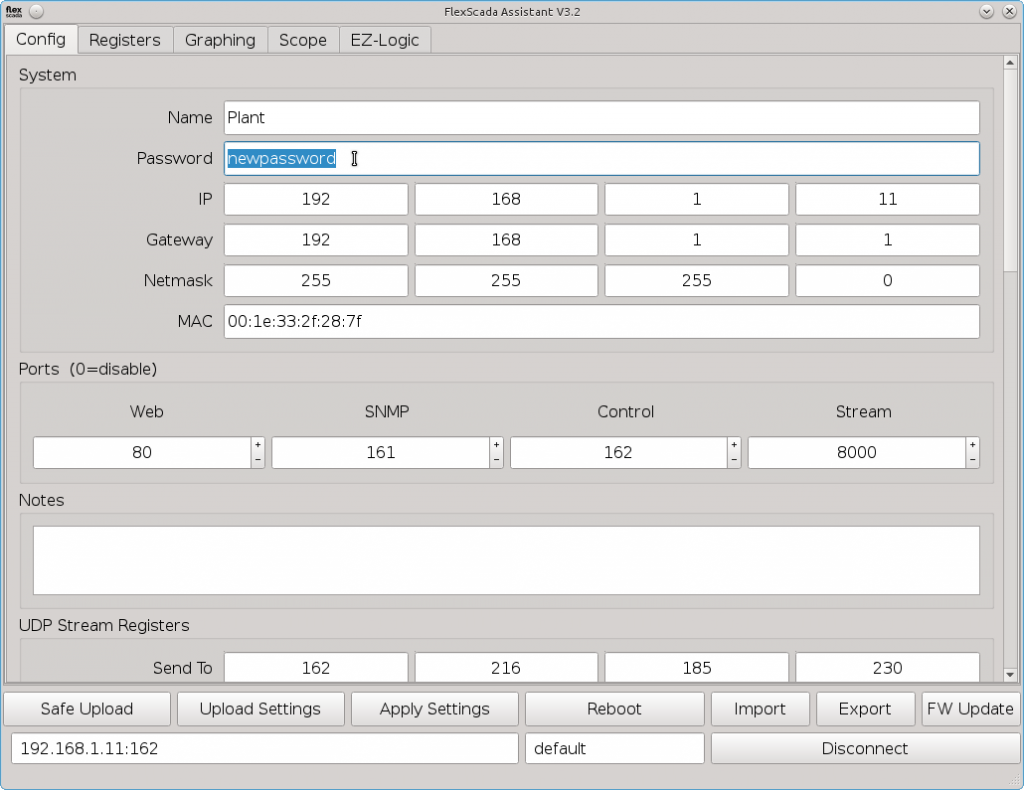
Step 3. Add a password to your device if you haven’t already set one.. Simply enter your new password into the field as shown in the image below
Step 4. Configure your Flexs Q3 Device to send it’s data to our server by entering the highlighted settings (below) into your device, after entering the settings click the ‘Generate’ button to the right of the ‘UUID’ field to generate your devices unique identifier, Copy the generated UUID after it’s created as we will use it in the following steps.
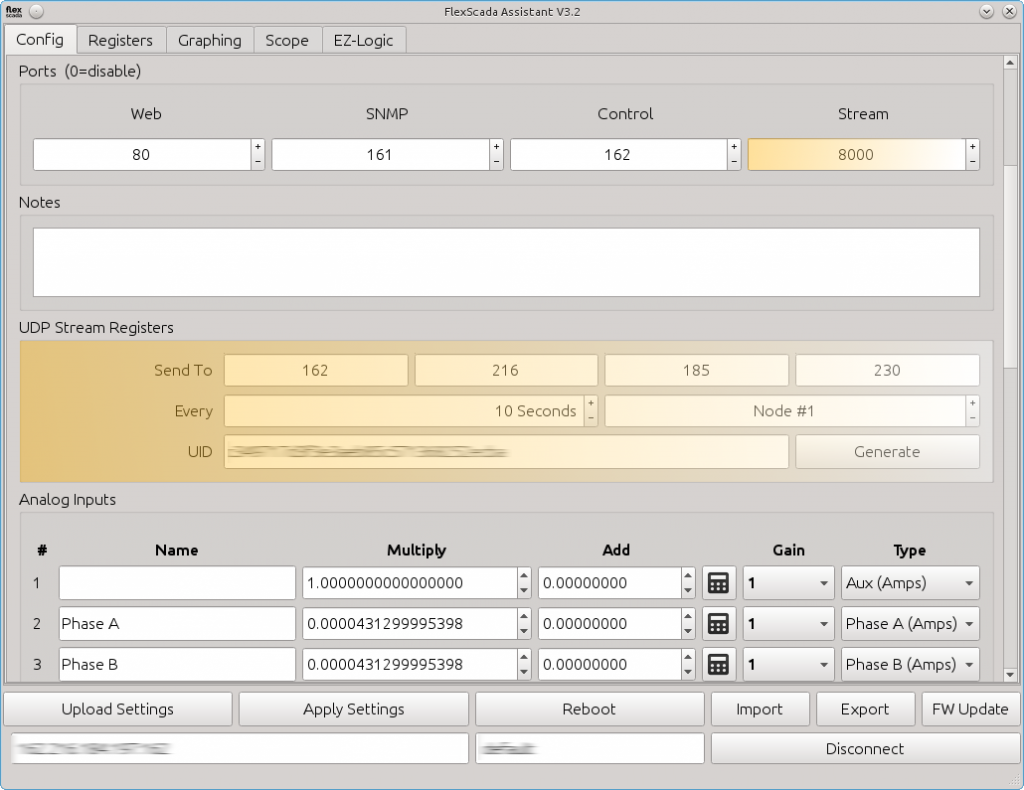
Step 5. Upload your settings to the device, you will be required to re-enter your password to verify, You will also get disconnected from the device after the new settings upload if you changed or added a password… Reconnect to the device with the new password and hit the “Apply Settings” button…
Step 6. Create an account for our Online Management Interface by going to https://flexscada.com/monitoring?page=signup
Step 7. Add your device by selecting ‘Admin->Devices’ page from the top menu bar and clicking the ‘Add Device’ button
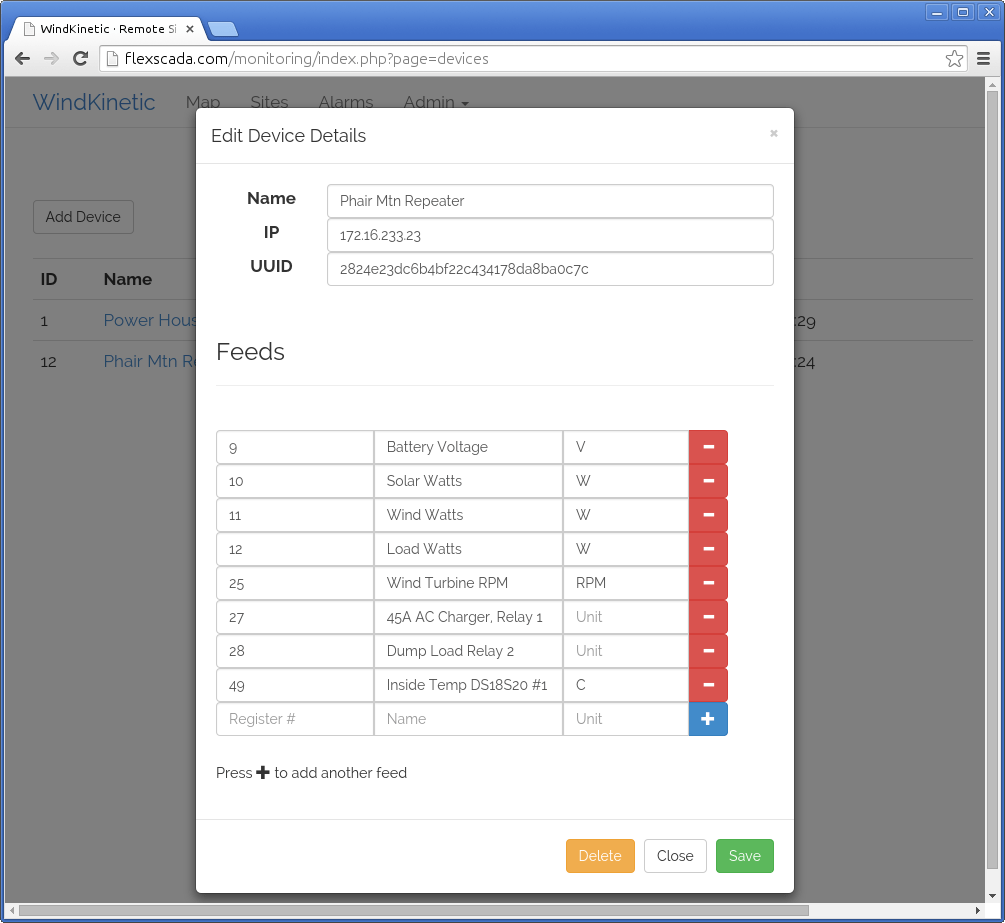
Enter the UUID you copied into the UUID field and assign the device a name. The IP field is ignored and will be automatically updated with the correct IP once the device comes online.
The Feeds allow a way to assign human readable names to the registers being read from the RTU Device (See understanding registers)
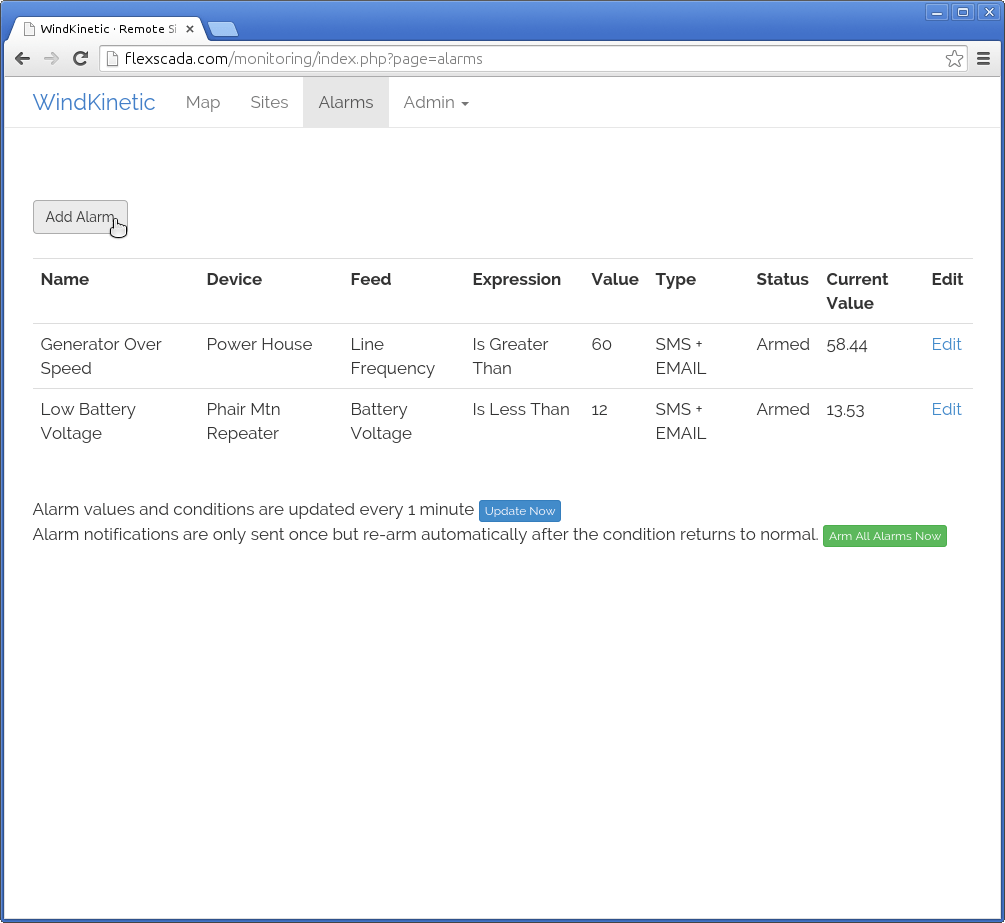
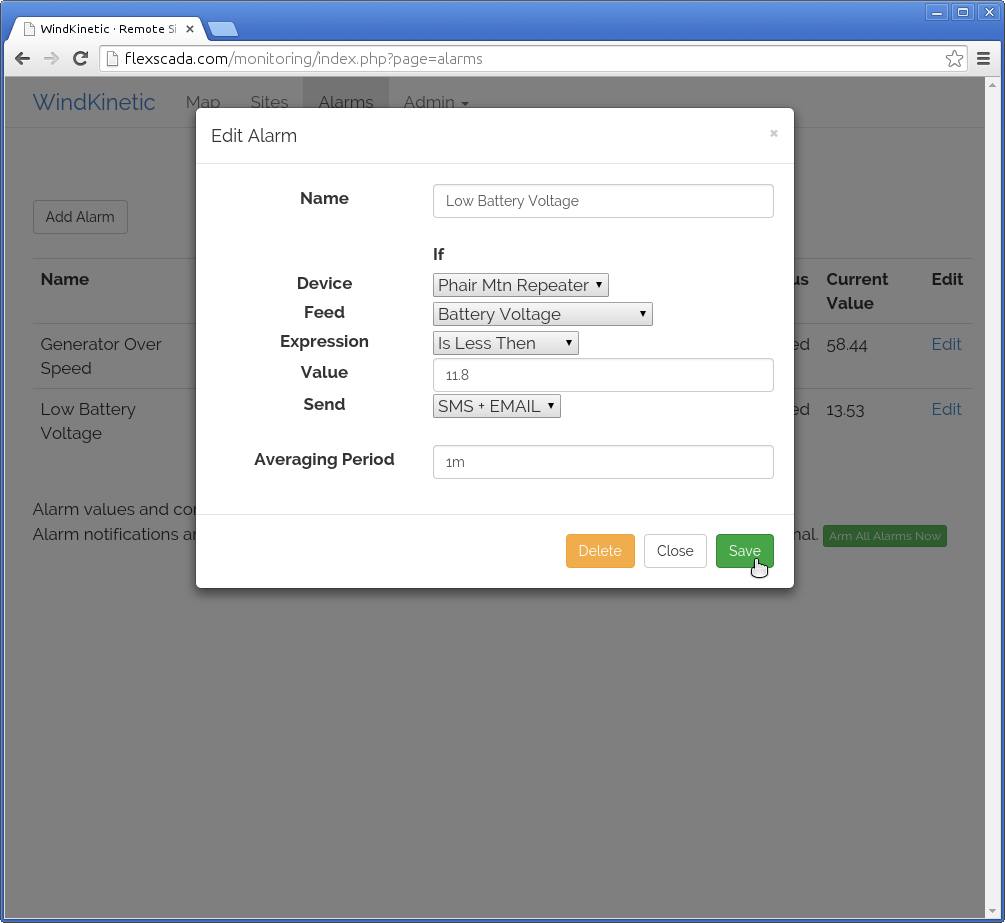
Step 8. Lets finish off our tutorial by creating an alarm for when a feed exceeds a set value


